Rabu, 01 April 2009

Instant WordPress Theme Creator

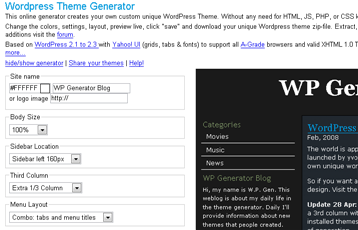
Ever wanted to make your own WordPress theme but you don’t know how to program? Well, you’re in luck! There’s a really cool WordPress Theme Generator where you can select how many columns you want, color scheme, text scheme, menu type, tag cloud, and more — all with just selecting a few drop downs.

Once you’ve decided on the layout and are ready to create your new blog template, just click the “save” button and you’ll get a link to download the zipped files. You don’t need any knowledge of HTML, JS, PHP, or CSS and just need to be able to unzip and upload files.

wp-theme-generator.png


This generator is great for creating basic WordPress themes if you’re new to blogging or want a good framework to build on top of. There are only a few images which get created so you’ll likely want to spice up your blog (especially your header) with some cool graphics. You might want to read our post on “How to Easily Create Make Your Own Web 2.0 Blog Logo” and instantly add flare to your new WordPress theme.

Author: David


Read more...

How To Easily Make Your Own Web 2.0 Blog Logo

It’s a question I get asked quite often and I figured it’s easier just to write a post about it. Many people who download Blogger templates or WordPress themes from our site would like to replace the default header image with one more personal and professional-looking. Some templates come with header logo or some with just plain text so it would be nice if you could spice up your blog with a cool Web 2.0 logo wouldn’t it?

There are a couple great free sites out there that allow you to instantly create a Web 2.0 header logo for your website. You don’t need any photo editing software experience or technical knowledge — just type in the text you want, select the style, font size, color, etc and voila — you’ve got a brand new Web 2.0 logo!

Two of the free sites I would recommend are http://cooltext.com and http://web2.0stylr.com which is actually how I first created the logo for this site. Here’s one I recently built in less than two shakes of a lambs tail.

logo-img.jpg


Author: David

Read more...

Free Live Blog Traffic Widget

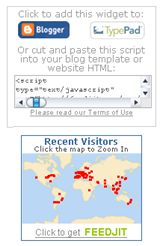
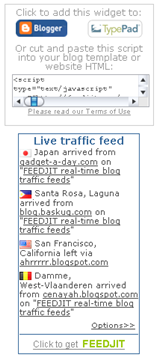
Ever want to know things like who’s visited your web site, where they came from, and what they’re reading? Well, now you can with this cool free blog widget by FEEDJIT. They provide a simple page where you select one of four widgets which are: live traffic feed, live traffic map, live recommended reading, or live page popularity.

Here are my two favorites which will fit nicely in your blog’s sidebar.

feedjit-widget.png feedjit-widget2.png


It couldn’t be any easier for Blogger users to install. Just click on the “Add It” link and a Blogger icon will appear. Click on that and it will take you to your Blogger site asking to install the widget. Same goes for Typepad users. WordPress or other web site owners will need to copy the small bit of javascript and paste it somewhere on your site.

Having this widget on your blog makes it fun to look at your site each day and see who’s recently stopped by. Knowing that people from all over the world actually read some of your content is pretty rewarding. Also knowing what sites they came from provides some good data especially if you don’t have any blog analytics like Google Analytics running on your site.

Go and get your free FEEDJIT blog widget and get a better idea of who’s coming to your blog!

Ready to super charge your blog? Check out our professional premium blogger templates or make money by joining our blog affiliate program!

If you like this post then please consider subscribing to our eBlog Templates RSS feed. You can also subscribe by email and have new templates and articles sent directly to your inbox.

Author : David

Read more...

Free Blogger Training Videos

Using Blogger can be confusing especially with the limited documentation available by Google. If you’re like me, you prefer visual tutorials vs the traditional documentation method which makes learning more enjoyable and interactive.

There’s a website called Recognized Expert which provides over 7 hours of free Blogger training videos covering the basics and also some more advanced techniques. It’s a very helpful way for those of you who are beginners looking to better understand how Blogger works.


The content is created by two brothers by the names of Bob and Josh Sommers who do a great job explaining Blogger step-by-step. I highly recommend you checking out their collection of videos as I’m sure you’ll learn something new just by watching a couple of them. Here’s the high-level list of the videos available on their site:

* Getting Started with Blogger
* Navigating Blogger
* Text and Links
* Uploading Images to Blogger
* Video In Blogger
* Post Options
* Managing Posts
* Page Elements
* Post Options
* Gmail Account
* Uploading Audio
* Working With Your Template
* Blog Settings - Basic
* Blog Settings - Publishing
* Blog Settings - Formatting
* Blog Settings - Comments
* Blog Settings - Archiving
* Blog Settings - Site Feed
* Blog Settings - Email
* Blog Settings - Permissions
* Google Gadgets
* Slideshows
* Credit Cards and PayPal
* Converting Your Blog Into A Website

Let me know what you think and if these videos are helpful for Bloggers of all levels. It’s really great of the Sommers brothers to provide all this content for free! Watch the videos now.

Ready to super charge your blog? Check out our professional premium blogger templates or make money by joining our blog affiliate program!

If you like this post then please consider subscribing to our eBlog Templates RSS feed. You can also subscribe by email and have new templates and articles sent directly to your inbox.

Read more...

Selasa, 31 Maret 2009

Statistik gratis untuk web atau blog anda

Statistik web/blog merupakan hal penting yang tidak bisa ditinggalkan begitu saja, meski bukan fasilitas wajib, tetapi hampir semua web/blog populer pasti mempunyai statistik pengunjungnya, baik ditampilkan maupun tidak. Saat ini begitu banyak yang menawarkan fasilitas statistik gratis untuk web/blog kita.

Berikut beberapa layanan web statistik gratis yang sebagian sudah pernah saya coba. Disini tidak akan dibahas detail fasilitas yang diberikan, terutama fasilitas umum, seperti Unique Visitor, Visits, PageViews, dan lainnya, tetapi sedikit memberikan gambaran umum atau nilai plus/minus yang bisa di amati.
Google Analytics

Mungkin fasilitas gratis yang diberikan google ini bisa dikatakan yang terlengkap dari yang lainnya. Selain berbagai fasilitas standard yang disertai dengan tampilan grafik, export ke pdf, csv, xml dan lainnya, disertakan pula fasilitas hasil pencarian dari google yang masuk ke web kita. Dibandingkan dengan yang lainnya, Google Analytics memberikan detail yang lebih banyak.
Hanya saja hasil yang ditampilkan hanya bisa dilihat oleh pemilik account itu sendiri, belum bisa di set sebagai public. Selain itu, detail statistik dan fasilitas lengkapnya terkadang harus dibayar dengan beban loading yang agak berat.


Sitemeter

Sitemeter memberikan statistik standard, hanya saja untuk versi gratis, tidak diberikan statistik unique visit dan pageviews. Statistik bisa di set public ( semua orang bisa melihat ) maupun private. Meskipun fasilitas standard, tetapi proses loading dapat dikatakan cukup cepat, sehingga tidak perlu khawatir membebani proses loading web kita.

Tampilan grafik yang diberikan sederhana, tidak ada fasilitas melihat trafik untuk tanggal tertentu, hanya disediakan hari ini, 7 hari, 30 hari dan 12 bulan sebelumnya. Dan sepertinya untuk statistik pagevies lebih kecil dibandingkan layanan lainnya.


HiStats

Ini yang baru saja saya ikut daftar. Baru beberapa hari ikut, langsung tertarik. Fasilitas standard yang diberikan ditampilkan cukup menarik, hampir semua dengan grafik dan ditampilkan secara dinamis. Misalnya ketika cursor kita arahkan di salah satu grafik maka akan ditampilkan detailnya. Seperti Google analytics, disertai perkiraan jam dan hari ini.


Selain itu, statistik bisa di set publik, private dan bahkan tidak menampilkan logo/icon statistik di web kita alias hidden. Kita juga dapat memilih alternatif puluhan icon/gambar yang akan ditampilkan di web/blog kita. Dibandingkan sitemeter, HiStats lebih lengkap dengan tampilan yang lebih menarik.


Motigo webstat

Pertama kali yang saya gunakan adalah motigo webstat, yang sebelumnya namanya bukan motigo. Hasil yang diberikan cukup minim, tetapi disana diberikan rangking berdasarkan pengunjung web/blog, baik total maupun per negara, termasuk Indonesia.

Awalnya tidak ada masalah, tetapi mulai curiga ketika banyak keluhan bahwa web ini sering muncul popup besar (iklan) yang cukup menganggu. Ternyata setelah di cek kode yang di load, iklan tersebut asalnya dari motigo webstat. Kode yang dipasang memanggil kode javascript dan kode tersebut memanggil kode-kode javascript lainnya yang salah satunya berisi iklan tersebut. Sejak itu saya tidak memasang lagi statistik motigo.


ExtremeTracking

Sampai saat ini, pendaftaran untuk wilayah Indonesia sudah di tutup. Ketika saya ingin mencoba mendaftar, ternyata sudah tidak dibuka untuk account free. Tetapi sempat melihat beberapa statistik web yang menggunakannya. Hasil statistik ini bisa di set public, sehingga setiap pengunjung bisa melihatnya.

ExtremeTracking memberikan fasilitas standard statistik web, Fasilitas tambahan sepertinya hanya statistik referral dari usenet, email atau hardisk.


StatCounter

StatCounter menyediakan fasilitas Invisible Counter, selain fasilitas standard web statistik, statCounter juga memberikan fasilitas tambahan lainnya misalnya : Keyword Analysis, Recent Keyword Activity, Search Engine Wars, Visitor Paths, Recent Pageload Activity, Recent Visitor Activity, Email Reports, User Access Management, Public Stats dan lainnya.

Sayangnya jika web/blog kita setiap hari sudah mencapai 9000 pageview atau lebih, maka harus upgrage ke versi yang berbayar. Tapi jika masih kurang dari itu, statCounter masih tetap gratis.


Clicky

Clicky mengusung nama Web Analytics 2.0, dengan tampilan yang khas. Di perbandingan yang ditampilkan, Clicky menampilkan beberapa keunggulan dibanding Google analytics. Misalnya Developer API, See every action by every visitor, Visitor organizations (e.g. Microsoft Corp), Widgets of Mass Deliciousness untuk dipasang di web site, stats via RSS feeds dan lainnya. Yang menarik adalah fasilitas Statistik Real Time (Spy), jadi setiap satu atau dua detik bisa dilihat statistik pengunjung web kita.
Clicky tidak sepenuhnya free, fasilitas sepenuhnya (pro) bisa didapatkan selama 21 hari, setelah itu tinggal memilih versi gratis (yang terbatas fasilitasnya) atau versi pro dengan membayar. Sampai saat ini Clicky belum bisa menerima web site yang dalam sehari punya lebih dari 100,000 page views.


Piwik

Piwik merupakan Open source web analytics. Tujuannya menjadi alternatif dari Google analytics. Berbeda dengan web statistics lainnya, Piwik dibuat berdasarkan plugins, sehingga kita bisa menambah atau menghilangkan fasilitas yang tidak diinginkan. selain itu, kita sendiri yang memiliki data, dan bisa diolah datanya menggunakan Open API. User Interface juga dapat di custo


Read more...
Add Favicon - Widget For Blogger

Favicon is known as favorite icon for a your blog or site. Adding a Favicon to your blog is a good way to distinguish your blog from the millions of other blogs.
Below is Screen Shot of my Favicon so that you can know what Favicon exactly is :-


Ok now you what Favicon is now let see how to add it into your Blog or site. I have seen many procedures of adding Favicon. I will tell you the simplest method to add it
Here we go...

Step 1> step 1 is choosing you Favicon it may be in any format like JPG,JPEG,PNG Etc. Just save that Image which you like into your hard drive.
If you have problem in finding Favicon then simply go to google images and type the keywords like Favicon or icon or anything you want as Favicon (Be Creative).After saving your image file into your hard drive go to step 2

Step 2> Now you need to create the .ico file of that image file which you saved into your hard drive. For making .ico file of any image file i use Html-Kit.com. After opening there site you just need to upload you image file there and they convert you image file into .ico format then you just need to download it and step 2 is Done !

Step 3> Now time to upload your .ico file to any hoster like Google pages. After uploading your .ico file get the path of that image file - http://Bloggingforbread.googlepages.com/favicon.ico now after getting the path move to Step 4

Step 4> Now login to your blog and go to the Edit Html tab from Template. Then paste the following code below

Before pasting this code to your blog's Html just exchange both the line - http://youraccount.googlepages.com/myicon.ico
with your .ico files path

That's It you are Done !

If you have any type of problem adding Favicon to your Blog fell free to ask here by commenting.

Happy Blogging And Good Lucky !!

Read more...

Disable Right Click on Blog - A Blogger Hack

I know many Blogger don't like to get there unique content copied by any other blogger.
SO now don't worry about getting your content copied here is a solution.
By this Hack users of your blog cannot right click on your blog and your content remains safe :)

This widget is very simple to install into your blog
Following are the steps

Step 1 > Go to Template -> Page Elements.
Step 2 > Add a Page Element -> then Add a HTML
Step 3 > Now just copy and save the following code into Html and you are done !


Enjoy this hack !!!

Read more...

How to Create Search Engine in Blogger

Now I will show how to create "Search Engine" in your blogger. This Search Engine is use to find articel in your blog, not to find articel at all website in the world. It's very easy, just follow the trick below you will have search engine in your blog. Here's the step:


1. Login to Blogger, Go to "Layout --> Page Elements". Klick "Add a page elements" then chose "HTML/Java Script".
2. Put the code below into "Content" Box


Change yourblogname with your blog's name. The number "30" is width of your search engine, you can change it for appropriate to your layout.

Read more...

Senin, 30 Maret 2009

Tips Meningkatkan Rangking & Traffic Webpage

Karena berperinsip “time is money”, dan butuh waktu lebih lama, tidak heran bila seorang web designer kurang berusaha membuat website yang memiliki rangking tinggi. Seorang web designer hanya mendesain website yang hanya bisa dilihat customernya, sedangkan kemunculan website itu sendiri di Search Engine kemungkinan besar tidak ada

Umumnya web designer kurang peduli dengan ranking web, karena bukan merupakan bagian pekerjaan mereka. Seorang web designer akan lebih fokus pada creative work. Lagi pula, web designer tidak terlalu mempelajari cara untuk membuat sebuah website yang memiliki ranking tinggi di banyak search engine.


Dalam postingan kali ini, saya coba memberikan tips, yang mungkin berguna bagi kamu yang newbie ( kalo yang udah jago, tolong ditambahin ya :D) untuk membuat website kamu mendapatkan rangking tinggi sekaligus juga web trafficnya. Tips ini juga berlaku untuk web blog.

Langkah - langkah yang harus kamu kerjakan adalah sebagai berikut :

1. Cari tahu keyword apa saja yang paling sering digunakan orang untuk mendapatkan tema - tema yang ingin mereka ketahui di search engine, gunakan keyword tersebut sebagai teks dalam desain website kamu untuk mengingkatkan web traffic.
2. Umumnya web designer senang menggunakan banyak grafik dan program seperti Java, Flash, dan lain - lain yang dapat menurunkan renkings dan trafic. Oleh karena itu, mulai saat ini kamu harus menggurangi penggunaan grafik, Java, Flash dan sebagainya itu.
3. Web Page seperti halnya aplikasi spread sheet, didesain menggunakan cell dan table. Gunakan sedikit mungkin cell dan table dalam desain web kamu.
4. Buat Meta Tags. Setiap halaman (page) harus memiliki keywoard berbeda dalam Title dan Description Meta Tag.
5. Jangan sering - sering mengulangi kata - kata dalam keyword Meta Tag.
6. Letakkan keyword penting di bagian atas halaman sebagai keyword
7. Halaman dan keyword yang paling penting harus berada di page pertama website kamu.
8. Website berbasih Frame seharusnya hanya digunakan untuk intranet (sebuah situs hanya untuk pegawai perusahaan) dan tidak untuk internet.
9. Jangan memasukan halaman yang redirec - halaman yang otomatis membawa kamu ke halaman lain
10. Jalankan program analysis untuk menghitung beberapa sering keyword yang digunakan di 7500 karakter code pertama dalam komputer.
11. Batasi penggunaan services yang secara otomatis men-submit URL kamu ke top 10 search engines.
12. Ketika selesai dengan sebuah halaman (page), jalankan program spell checking dan kemudian compress html code.
13. Peliharalah track ranking search engine dan website traffic kamu.
14. Begitu website ter-index di search engine, seorang web designer harus kembali dan memperbaiki halaman (page) yang belum mendapatkan ranking tinggi pada keywords.
15. Seriap 3 bulan sekali lakukanlah perubahan kecil pada setiap web page situs kamu. Search engine lebih menyukai situs yang selalu melakukan perubahan kecil dari pada situs yang dibiarkan bertahun - tahun tanpa upgrade.


Read more...

Tips Percepat Koneksi Internet Anda Pada Windows XP dan Vista

Apakah kamu tahu kalau selama ini Windows memakai Bandwidth kita 20%? iya memang bener, windows itu sebenarnya mencuri 20 persen dari jalur akses internet kita, kenapa?karena windows merupakan OS yang selalu menginginkan Up To Date seperti SP3 dan Service Pack, makanya dari pada itu dia sengaja update otomatis di background tasking kita, jadi Untuk mengambil bandwidth kita kembali dan koneksi lebih cepat lakukan langkah berikut ini :


1. Klik start, run trus ketik “gpedit.msc” (Tidak pakai tanda petik).
2. Pada computer configuration - administrative template - klik Network.
3. Klik Qos packet scheduler - Double Klik pada Limit Reservable Bandwith.
4. Klik ENABLED reservable bandwith dan ubah settingannya ke 0 (nol)% habis itu Klik Apply dan Klik OK. Restart Komputer anda.

Tapi semua itu juga tergantung dengan kecepatan koneksi anda sendiri. Tips ini bisa mempercepat koneksi anda jika memakai OS Windows XP dan Vista.

artikel di ambil dari portal.telkomspeedy
Bookmark and Share

Read more...

How to Install Google Analytics on Blogger

How to Install Google Analytics on Blogger
Author: David


Wouldn’t it be nice to know how many people actually visited your blog each day? How about knowing which of your posts are the most popular? Well surprisingly Blogger doesn’t currently offer any native blog analytics but fortunately there is Google Analytics — available for free.

Google Analytics is a great tool that will show you all sorts of useful information about how people found your blog, keywords they searched on to find you, where they came from and even how long they stayed. You’ll learn more about where your visitors come from and how they interact with your blog. This is a must tool if you are trying to build a profitable blog otherwise you are flying blind!

This article will show you how to add Google Analytics to your Blogger blog. It’s a fairly simple process and doesn’t require any technical skill at all.

Step #1 - Setup a Google Analytics Account

Go to Google Analytics and sign in using your Blogger login. If your account doesn’t work for some reason, you can create a new one instead. Once you login you’ll see a screen that looks like this:

Click on the “Sign Up >>” button and proceed to the next step which will ask you for your general information. Website URL, Account Name, Country, and Time Zone. The screen will look like this:

If you noticed, I just put my Blogger url (without the http://) and called it “David’s Account” because this is your top-level container for 1 or 100 different websites so it’s a good idea to name it something more general. The next step will ask you for your contact information which includes your first name, last name, phone number, and country. Easy so far right? :-)

Your last step in signing up will ask you to accept the user agreement terms and conditions which you should read (just kidding…who actually ever reads these entire legal terms anyhow?).
Now this next screen is very important. This is the code you will need to copy and paste into your blogger template. Go ahead and click into the box and it will automatically highlight the entire block of code for you. Now you need to copy that code and paste it into notepad or into a MS Word document. Save it as you’ll need to use it later.
After you click on the “continue >>” button you will be taken to your brand new Google Analytics dashboard! You will see your blogger blog listed but with no analytical data….yet.
Ok, now you are done with setting up your Google Analytics account. The next step is placing the tracking code into your Blogger template so it can report back to Google Analytics and provide you with some cool data points.

Step #2 - Adding GA Tracking Code to Your Blogger Template

This is not a very difficult step even if you are afraid to touch your template code. Login to your Blogger account and then click on the “Layout” => “Edit HTML” tabs. This will bring you to the template code. Before you make any changes, I advice you to back up your template just in case there are any problems. After you’ve done so, continue reading.

Now in the edit template html code window, scroll all the way to the bottom of your template code and look for the tag. There should only be one of these closing tags in your template. If you can’t find it then your template wasn’t properly created and you should add one right above the tag.The tag should always be your last line of code in your template. It signifies the end of your template.

Ok, now go back to the code you saved before in a Word Doc from Google Analytics. You are going to copy it and paste it right above the tag as illustrated in the image below. The yellow highlighted code is the new GA code I just pasted into my template.
Save your template and you shouldn’t get any error messages. If you do, it’s most likely not related to this GA code and something else with your template itself. Assuming you’ve been successful with your save, you are all done embedding the GA code in your template!

Step #3 - Confirm Google Analytics is Tracking

Go back into your Google Analytics account and look at your dashboard. Most likely you will see a little yellow exclamation mark under the “status” column that looks like this: google analytics tracking not installed. This means everything isn’t working properly yet which is fine because we are about to tell GA we just added the code. From your dashboard, click on the “edit” link which is located to the far right.
After you click on that link, you’ll see another screen like below. It will say “Tracking Not Installed” followed by a link “Check Status”. You’ll want to go ahead and click on that link which will tell GA to visit your site and look for the new code you just pasted in your template.
Assuming you pasted the code in there as instructed above, GA will find the new code and begin tracking everything on your blog. If you are still having problems, it’s most likely something to do with GA and you should read their help guide to troubleshoot your problem.
The message seen here, “Waiting for Data” means you have correctly setup GA and data is being gathered! Click on the top left Google Analytics logo and it will take you back to your dashboard. From there click on the “View report” link and that’s where all your very important Blogger visitor data will start appearing!
Now it usually takes an hour or so before you will see any data (maybe longer if you don’t get much traffic to your blog) so please be patient. Trust me, you’ll be logging in at least once a day just to see how much traffic your blog is getting. It’s very addicting and powerful information to learn from. You’ll be surprised which posts are your most popular and what countries people are coming from to read your blog.

Google Analytics is very powerful and we have just learned how to install it into your Blogger template. We haven’t even scratched the surface on the features and reporting it can do. For most Bloggers, this will be enough. Data will be collected and you will just review it. Others with more in-depth goals (like selling products or services, creating a sales funnel, etc) will want to spend more time learning GA. Hope you enjoyed the tutorial and don’t blame me for your new found addiction!


Read more...

10 Great Blog Traffic Tips

In every bloggers life comes a special day - the day they first launch a new blog. Now unless you went out and purchased someone else’’s blog chances are your blog launched with only one very loyal reader - you. Maybe a few days later you received a few hits when you told your sister, father, girlfriend and best friend about your new blog but that’’s about as far you went when it comes to finding readers.

Here are the top 10 techniques new bloggers can use to find readers. These are tips specifically for new bloggers, those people who have next-to-no audience at the moment and want to get the ball rolling.

It helps if you work on this list from top to bottom as each technique builds on the previous step to help you create momentum. Eventually once you establish enough momentum you gain what is called “traction”, which is a large enough audience base (about 500 readers a day is good) that you no longer have to work too hard on finding new readers. Instead your current loyal readers do the work for you through word of mouth.

Top 10 Tips

10. Write at least five major “pillar” articles. A pillar article is a tutorial style article aimed to teach your audience something. Generally they are longer than 500 words and have lots of very practical tips or advice. This article you are currently reading could be considered a pillar article since it is very practical and a good “how-to” lesson. This style of article has long term appeal, stays current (it isn’t news or time dependent) and offers real value and insight. The more pillars you have on your blog the better.

9. Write one new blog post per day minimum. Not every post has to be a pillar, but you should work on getting those five pillars done at the same time as you keep your blog fresh with a daily news or short article style post. The important thing here is to demonstrate to first time visitors that your blog is updated all the time so they feel that if they come back tomorrow they will likely find something new. This causes them to bookmark your site or subscribe to your blog feed.

You don”t have to produce one post per day all the time but it is important you do when your blog is brand new. Once you get traction you still need to keep the fresh content coming but your loyal audience will be more forgiving if you slow down to a few per week instead. The first few months are critical so the more content you can produce at this time the better.

8. Use a proper domain name. If you are serious about blogging be serious about what you call your blog. In order for people to easily spread the word about your blog you need a easily rememberable domain name. People often talk about blogs they like when they are speaking to friends in the real world (that’’s the offline world, you remember that place right?) so you need to make it easy for them to spread the word and pass on your URL. Try and get a .com if you can and focus on small easy to remember domains rather than worry about having the correct keywords (of course if you can get great keywords and easy to remember then you’ve done a good job!).

7. Start commenting on other blogs. Once you have your pillar articles and your daily fresh smaller articles your blog is ready to be exposed to the world. One of the best ways to find the right type of reader for your blog is to comment on other people’s blogs. You should aim to comment on blogs focused on a similar niche topic to yours since the readers there will be more likely to be interested in your blog.

Most blog commenting systems allow you to have your name/title linked to your blog when you leave a comment. This is how people find your blog. If you are a prolific commentor and always have something valuable to say then

Read more...

Apa Pentingnya Web Stats dan Web Counter?

Statistik pada website atau blog merupakan hal penting yang tidak bisa diabaikan begitu saja. Meski bukan fasilitas wajib, hampir semua website / blog populer pasti mempunyai statistic pengunjung, baik ditampilkan maupun tidak. Ada banyak layanan yang menawarkan fasilitas statistic gratis untuk website atau blog.
Berikut ini adalah beberapa layanan web statistic yang gratis :


HiStats
http://www.histats.com
Dari sekian web stat, HiStats adalah yang paling baik. Fasilitas standard yang diberikan, ditampilkan cukup apik, hamper semua dengan grafik dan tampilkan secara dinamis. Misalnya, ketika cursor kita arahkan disalah satu gradik, maka akan ditampilkan detailnya. Seperti Google analytics, disertai perkiraan jam dan hari ini.
Selain itu statistic bisa diset ke public, private dan bahkan tidak menampilkan logo/icon statistik di web kita alias hidden. Kita juga dapat memilih alternative puluhan icon/gambar yang akan ditampilkan di web/blog kita. Dibandingkan sitemeter, HiStats lebih lengkap dengan tampilan yang lebih menarik.
Untuk menggunakan fasilitas HiStats pada website/blog anda cukup mudah. Setelah masuk ke websitenya, anda hanya perlu melakukan 4 langkah mudah berikut ini :
Register Website/blog anda
Memilih counter style
Mengopy counter code
Meletakan counter code di website/blog anda
Google Analytic

http://www.google.com/analytics
Fasilitas gratis yang diberikan google bisa dikatakan yang terlengkap dibandingkan webstat lain, disamping berbagai fasilitas statndard dengan tampilan grafik, export ke pdf, csv, xml dan lainnya, disertakan juga dengan fasilitas hasil pencarian google yang masuk ke web kita. Dibandingkan dengan web stat lain, Google Analytics memberikan detail statistic lebih banyak.
Hanya saja hassil yang ditampilkan hanya bisa dilihat oleh pemilik account itu sendiri, artinya belum bisa di set sebagi public dan tampil dalam home page anda. Selain itu, detail statistik dan fasilitas lengkapnya terkadang harus dibayar dengan beban loading yang cukup berat.
Untuk menggunakannya anda harus sign up account baru dengan memasukan alamat URL website anda dan mengikuti langklah – langkah selanjutnya. Setelah mendapatkan code, anda harus mengcopy dan meletakkan code tersebut di bagian website/blog anda diposisi sebelum tag .
Sitemeter

http://www.sitemeter.com
Sitemeter memberikan statistic standard. Hanya saja untuk versi gratis tidak menyediakan statistic unique visit dan pageviews. Statistik bisa di set public (semua orang bisa lihat di website anda) maupun private. Meskipun fasilitas standard, tetapi proses loadingnya sangat cepat, sehingga tidak membebani loading website / blog anda.
Grafik yang ditampilkan cukup sederhana, tidak ada fasilitas melihat trafik untuk tanggal tertentu, hanya disediakan hari ini, 7 hari, 30 hari dan 12 bulan sebelumnya. Dan sepertinya untuk statistik pageviews lebih kecil dibandingkan dengan layanan lain.
Motigo webstat

http://webstats.motigo.com/
Motigo webstat memberikan hasil yang cukup minim, tetapi menyediakan ranking berdasarkan pengunjung web/blog, baik total maupun pernegara.
Namun banyak yang mengeluhkan karena layan ini sering memunculkan popup (iklan) yang cukup mengganggu. Dan ternyata, memang ikaln tersebut berasal dari Motigo webstat. Kode yang dipasang memanggil java script dank ode tersebut memanggil kode-kode javascript lainnya yang salah satunya berisi iklan tersebut.
StatCounter

http://www.statcounter.com
StatCounter menyediakan fasilitas standard web statistik, StatCounter juga memberikan fasilitas tambahan lainnya misalnya : Keyword analysis, Recent Keyword Activity, Search Engine Wars, Visitor Paths, Recent PageloadActivity, Recent Visitor Activity, Email Reports, User Access Management, Public Stats dan lainnya.
Sayangnya jika web / blog kita setiaphari sudah mencapai 9000 pageview atau lebih, maka harus di upgrade ke versi yang berbayar. Tapi jika masih kurang dari itu, StatCounter masih tetap gratis.
Clicky

http://getclicky.com/
Clicky mengusung nama Web Analytics 2.0 dengan tampilan yang khas. Diperbandingan yang ditampilkan. Clicky menampilkan beberapa keunggulan disbanding Googl Analytics. Yang menarik tersedia fasiltas Statistic Real Time (SPY), jadi setiap satu atau dua detikbisa dilihat statistiv pengunjung kita.
Clicky tidak sepenuhnya free, fasilitas sepenuhnya (Pro) bisa didapatkan selama 21 hari, setelah itu tinggal memilih versi gratis (yang terbatas fasilitasnya) atau versi pro dengan membayar. Sampai saat ini Clicky belum bisa menerima web site yang dalam sehari punya lebih dari 100.000 page views
Piwik

http://piwik.org/
Piwik merupakan Open Source, merupakan Open Source web analytics. Tujuannya menjadi alternative dari Google Analytics. Berbeda dengan web static lainnya, Piwik dibuat berdasarkan Plug Ins, sehingga kita bisa menambah atau menghilangkan fasilitas yang tidak di inginkan. Selain itu, kita sendiri yang memiliki data dan bisa diolah datanya dengan menggunakan Open API


by: http://ayadinata.com


Read more...

  © Blogger templates The Professional Template by Ourblogtemplates.com 2008

Back to TOP